Showing posts with label easy. Show all posts

Wednesday, December 7, 2011

Pumpkin Chocolate-Chip Square

These squares are a staple in our house throughout the fall and winter. They are so fast and easy, that these are the go to for those last minute party invites where you need to bring something along.


Pumpkin Chocolate-Chip Squares
From Martha Stewart Food
Yields: 1 9x13 inch pan cut to whatever size squares you prefer (about 24)

Ingredients:
2 C. All-purpose Flour
1 Tbsp. Pumpkin-Pie Spice (1 ½ tsp. ground cinnamon, ¾ tsp. ground ginger, ½ tsp. ground nutmeg, ½ tsp. ground allspice, and ½ tsp. ground cloves)
1 tsp. Baking Soda
¾ tsp. Salt
2 Sticks Unsalted Butter, room temperature
1 ¼ C. Granulated Sugar
1 Egg
2 tsp. Vanilla Extract
1 C. Canned Pumpkin Puree
12 ounces Semisweet Chocolate Chips

Directions:

1.       Preheat oven to 350 degrees. Line bottom and sides of a 9 x 13 inch baking pan with foil, leaving an overhang on all sides. In a medium bowl, whisk together flour, pie spice, baking soda, and salt; set aside.

2.       With an electric mixer with paddle attachment, cream together butter and sugar on medium-high speed until smooth; beat in egg and vanilla until combined. Beat in pumpkin puree (mixture may appear curdled). Reduce speed to low, and mix in dry ingredients until just combined. Fold in chocolate chips. **Note: You do not need to coat the chocolate-chips for this recipe, the batter is so very thick, the chocolate will not sink to the bottom.


3.       Spread batter evenly in prepared pan. Bake until edges begin to pull away from sides of pan and a toothpick inserted in the center comes out with just a few moist crumbs attached, 35-40 minutes. Cool completely in pan.


4.       Lift cake from pan using foil as an aid. Peel off foil and use a serrated knife to cut into squares.

Monday, November 7, 2011

Guava Turnovers

My grandpa recently visited from California and brought with him about 25 lbs of guavas for his only granddaughter. I love guavas and normally would never even contemplate changing the flavor by cooking them, however, 25 lbs. is even too much for me to eat before they go bad. I should mention I had just finished a 10 lb. shipment a couple of weeks earlier.

So, although I still very much prefer the plain fruit straight from the tree, these turnovers turned out quite well.


Guava Turnovers
Yields: 8 large turnovers

Ingredients:

·         2 Sheets of Frozen Puff Pastry, Thawed
·         2 lbs. Guavas, peeled and halved
·         ¼ C. Sugar
·         2 tsp. Lemon Juice
·         1/3 C. + 1 Tbsp. Water
·         1 Egg

Directions:

1.       Roll out 2 sheets of puff pastry to about 12” x 12”
2.       Cut each sheet into 4 squares, place on parchment covered cookie sheet, cover with plastic wrap and place in refrigerator.
3.       Combine guavas, sugar, lemon juice, and 1/3 C. water in a saucepan.


4.       Bring to a boil on medium-high heat, stirring occasionally until sugar is dissolved.
5.       Cover and reduce heat to medium-low. Simmer until fruit is tender, stirring frequently, about 10 minutes (this will vary depending on the ripeness of your guavas, mine were quite ripe already).
6.       Uncover and allow liquid to reduce, about 10 minutes, stirring frequently.


7.       Remove from heat, mash guavas, leaving small lumps.
8.       Place about 2 Tbsp. of guava mixture into center of cold puff pastry square. Fold square diagonally over mixture forming a triangle. Repeat with remaining 7 puff pastry squares. Cover and place in refrigerator while you preheat oven to 400 degrees F.


9.       Mix 1 egg and 1 Tbsp. water in small bowl to brush onto turnover.
10.    When oven is ready, take cold turnovers out of refrigerator, cut slits into the top of each triangle, brush with egg/water mixure, and sprinkle generously with sugar.


11.    Bake at 400 degrees F. for about 20 minutes or until golden brown.
12.    Cool on rack and serve at room temperature.


Wednesday, October 26, 2011

Roasted Corn Salad

My mother-in-law brought over several ears of homegrown corn the other day, so I wanted to make something that would showcase the flavor of the corn and be something we don't eat on a regular basis. It tastes great, but be aware that the parmesan creates quite the aroma. This was super simple and makes a great side dish.


Roasted Corn Salad
Ingredients:
  •       3 Medium Ears of Corn
  •       1 1/2 Tbsp. Olive Oil
  •       1/4 tsp. Salt
  •       1/4 tsp. Pepper
  •       1 Tbsp. Mayonnaise, at room temperature
  •       1 1/2 Tbsp. Sour Cream, at room temperature
  •       2 tsp. Fresh Lemon Juice
  •       3 Tbsp. Grated Parmesan
  •       Generous pinch of Cayenne
Directions:
  •       Preheat oven to 400 degrees.
  •       Shuck the corn and cut the kernels from the cobs, tossing them in a bowl with the olive oil and plenty of salt and pepper.
  • Spread the kernels evenly on a large rimmed baking sheet and roast for 15 to 20 minutes, scraping and turning over the kernels once or twice, until they’re tender and lightly caramelized.
 
  •     Put the corn back into the bowl and stir in the mayonnaise, sour cream, lemon juice, Parmesan and cayenne. Taste and adjust any of the flavorings, including salt and pepper, if necessary.


Tuesday, August 30, 2011

Chocolate Souffle

My first souffle has turned out to be quite the success. It was light and chocolaty and totally delicious. It puffed up beautifully, then proceeded to fall within 5 minutes of coming out of the oven, but it came out directly underneath the air-conditioning vent so it was to be expected. Besides, by the time its served nobody knows what it looked like in the dish anyway.

Chocolate Souffle
I apologize, I cannot remember where I got this recipe

Ingredients:

About 1 Tbs. butter for dish
1/3 C. sugar, plus some for dish
3 eggs, separated
2 oz. good quality bittersweet chocolate, melted
Pinch salt
¼ tsp. cream of tartar

Directions:

Preheat oven to 350 degrees. Butter two 2-cup or one 4-cup soufflé or other deep baking dish(es). Sprinkle each with sugar, invert it and tap to remove excess sugar.
Beat egg yolks with all but 1 Tablespoon sugar until very light and very thick; mixture will fall in a ribbon from beaters when it is ready. Mix in the melted chocolate until well combined; set aside.

Wash beaters well, then beat egg whites with salt and cream of tartar until whites hold soft peaks; continue to beat, gradually adding remaining Tbs. sugar, until they are very stiff and glossy.


Stir a good spoonful of whites thoroughly into egg yolk mixture to lighten it; then fold in remaining whites, using a rubber spatula.

Transfer to prepared soufflé dish(es); at this point you can cover and refrigerate until you are ready to bake.

Bake until center is nearly set, 20 minutes for individual soufflés and 25 to 35 minutes for a single large soufflé. (I did mine in a 6 cup souffle dish and it took 25 minutes). Serve immediately with some vanilla ice cream and sweetened whipped cream.


Wednesday, August 3, 2011

Glazed Peach Pie

Alright, so I broke down and bought some organic peaches on sale at Whole Foods...emphasis on 'on sale'. Anywho, it was super awesomely delicious, so I guess it was worth it. This one's for you Al. Happy Birthday!


Glazed Peach Pie
adapted from Alexandra Thomas

Yields: one 9-inch pie

Take, toss, and let sit 1 hour:
2 1/2 - 3 1/2 C. Peach slices (4-5 medium peaches, ripe)
1 Tbls. Lemon juice
1/4 C. Sugar


1 Baked pie crust (recipe follows)
1/2 C. Sugar
3 Tbls. Cornstarch
2 Tbls. Butter
1/8 tsp. Salt
1/4 tsp. Vanilla extract

Directions:
  1. Peel, slice, and drain peaches into a bowl. Combine with lemon juice and sugar, let sit at least 1 hour. Add enough water to drainage to make 1 C. liquid. Blend 1/2 C. sugar and 3 Tbls. cornstarch in a small saucepan. Add peach syrup/water slowly. Boil 3 minutes or until thick and clear.
  2. Stir in butter, salt, and vanilla extract.
  3. Fold in peach slices.
  4. Pour into backed pie shell. Cool.
Pie Crust (Pate Brisee)

Yields: 1 double-crust or 2 single-crust 9- to 10-inch pies
  • 2 1/2 cups all-purpose flour
  • 1 teaspoon salt
  • 1 teaspoon sugar
  • 1 cup (2 sticks) unsalted butter, chilled and cut into small pieces
  • 1/4 to 1/2 cup ice water
Directions:

1.   In the bowl of a food processor, combine flour, salt, and sugar. Add butter, and process until the mixture resembles coarse meal, 8 to 10 seconds.
2.   With machine running, add ice water in a slow, steady stream through feed tube. Pulse until dough holds together without being wet or sticky; be careful not to process more than 30 seconds. To test, squeeze a small amount together: If it is crumbly, add more ice water, 1 tablespoon at a time.
3.   Divide dough into two equal balls. Flatten each ball into a disc and wrap in plastic. Transfer to the refrigerator and chill at least 1 hour. Dough may be stored, frozen, up to 1 month.
**For a no-bake pie requiring an already cooked crust:
  1. Preheat oven to 350 deg. F.
  2. Roll out dough into a circle 11 to 12 inches across
  3. Place in pie dish, crimp edges and cook for 20 minutes with pie weights.
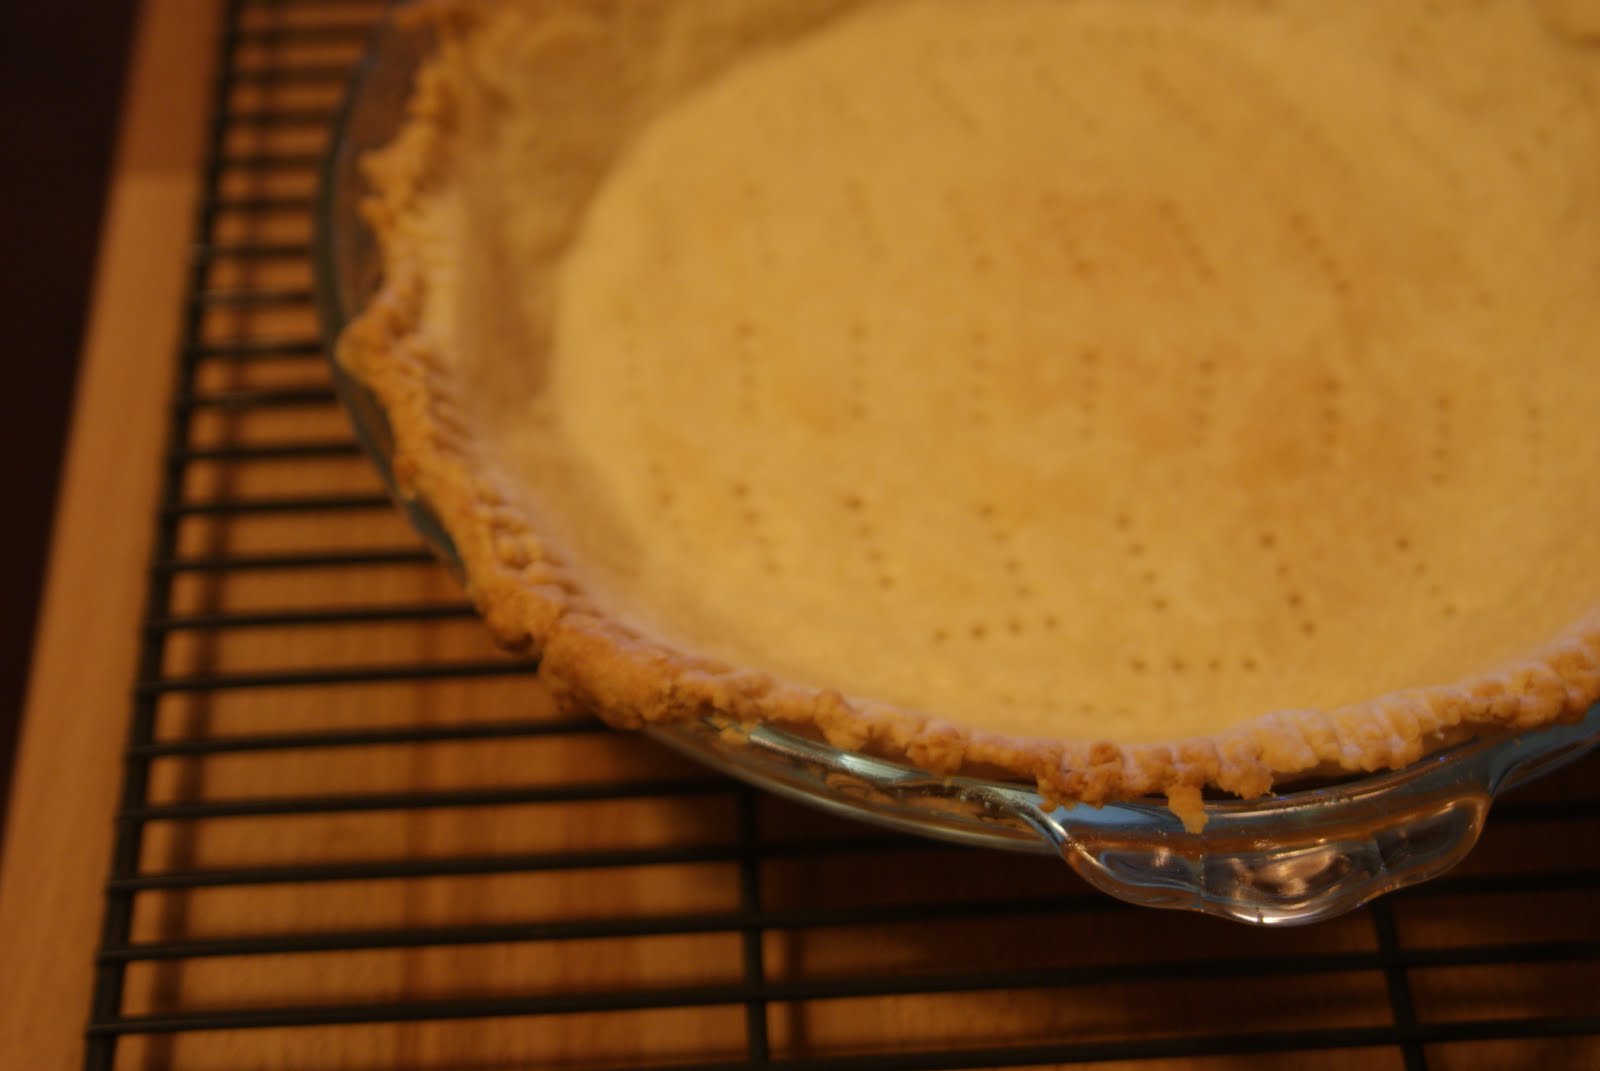
  4. Remove pie weights and parchment paper and cook for an additional 11 minutes or until bottom of crust is lightly golden. Cool in dish on cooling rack.


Mixed Berry Turnovers

So simple and so delicious. I used the last third of some puff pastry that I made and froze some time ago. I did notice a slight difference between my puff pastry and store-bought puff pastry in that it tasted more buttery. To me this is neither a plus or a minus, simply different.


Mixed Berry Turnovers
Yields 8 small turnovers or 4 large turnovers

Ingredients:
All-purpose flour for dusting
1 pound store-bought or homemade puff pastry
1/2 C. Sugar
7 ounces mixed berries, frozen or fresh
Pinch salt
2 Tbls. Cornstarch
2 tsp. Lemon juice
1 tsp. Lemon zest
1 Egg yolk
1 Tbls. Heavy cream or water
Sugar for sprinkling

Directions:
  • Lightly flour your work surface, roll out puff pastry dough to 1/8th of an inch thick, approx. 17 1/2 inch x 9 1/2 inch rectangle. Trim with pastry cutter to a 16 x 8 inch rectangle. Cut into either 4 or 8 equal squares. Place squares onto parchment covered cookie sheet. Cover with plastic wrap and chill until firm, at least 1 hour.

  • In a medium bowl mix together sugar, salt, cornstarch, lemon juice, lemon zest. Fold in mixed berries (if frozen, let thaw a bit). Let filling stand until juicy.

  • In a small bowl whisk together egg yolk and cream or water, set aside.

  • Stir filling and strain, discard excess liquid, divide equally among pastry squares. Place in the center of each square. Brush edges of squares with egg wash. Fold dough diagonally over filling to form a triangle, and press to seal. Crimp edges with a fork.


  • Place filled turnovers on a parchment covered cookie sheet. Cover with plastic wrap and freeze for 20 to 30 minutes. The filled turnovers can be frozen for a couple of weeks and do not need to be thawed before proceeding.
  • Preheat oven to 375 degrees. Brush tops of turnovers with the egg wash. Sprinkle generously with sugar. Bake for 25 to 35 minutes until turnovers are puffy and deep golden brown, rotating baking sheet half way through.
  • Immediately transfer turnovers to wire rack to cool.


Wednesday, July 27, 2011

Banana Bread

Banana bread is one of those super simple, go to recipes when you want something homemade that doesn't take a lot of effort. This recipe has been handed down from at least my mother's grandmother and the only thing that has changed is the method by which we mix the ingredients.


You can either do this in the blender or in a mixer, its up to you.

Banana Bread

Yields 1 loaf

2 eggs
3 large bananas over ripe (4 small/medium bananas)mashed with a fork
3 Tbls. milk
3 Tbls. oil (I use olive oil, but feel free to use vegetable oil)
1 cup sugar
1 tsp. banana extract (optional)(I've never used this, if you use enough bananas you shouldn't need more banana flavor)
dash of allspice
*If using a blender (as my mom does), mix all of the above in the blender, otherwise mix in stand mixer with paddle attachment(like I do).
2 cups flour
1/2 tsp. baking soda
2 tsp. baking powder
1 cup chopped walnuts (optional) or 1 cup chocolate chips (optional)
*Quickly mix in the rest of the ingredients, shouldn't take more than 30 seconds.
*If you're using walnuts or chocolate chips, fold them in after mixing in the rest of the dry ingredients.
*Grease loaf pan (I prefer unsalted butter over cooking spray, I think it adds a little extra flavor to the bread, but its up to you)
*Bake at 350 degrees F. for 60-70 minutes, tester should come out clean.
*Let rest in pan on a cooling rack for a few minutes, remove from pan and finish cooling on cooling rack
*Wrap what is not eaten immediately in foil


I hope you enjoy this as much as my family does.

Tuesday, July 12, 2011

Lemon Chess Pie


I had every and all intention of making a peach pie this week in honor of my best friend's birthday last week. Peach pie is the dessert I will forever and always equate with her. I can still picture her in her mother's kitchen peeling and slicing peaches. So, I went on a mission to the farmer's market in search of peaches. Low and behold, no peaches. Not only were there no peaches, there was no fruit of any variety. Don't get me wrong, we didn't leave empty handed. We got some delicious bok choi and snap peas to go in my husband's awesome stir fry that night and I was certainly happy about that, but fruit is what makes me dance. Those who don't believe in global warming are absolutely crazy for coco puffs. I mean summer not starting until the actual summer solstice, I've never heard of such a thing before. Don't even get me started on my quest for cherries in June.

I know what you're thinking, go to the store and buy some freaking peaches if you want them so bad. Its just not the same and I much prefer local, even if I have to wait until August (the hottest month of the year here) to make my peach pie.

Anywho, I decided to go ahead and try a pie I had seen on the King Arthur Flour blog a few days earlier...Lemon Chess Pie (recipe to follow). If you're like me, you have no idea what a lemon chess pie is but you love lemons and you like pie, so how bad could it be really. It actually turned out quite delicious. I took some over to my mom, who had to go in for emergency surgery, and it completely cured her. Ok, I made that last part up, but she really did enjoy it.


Lemon Chess Pie
filling from King Arthur Flour
crust from Martha Stewart
*I used this crust because I had a disc of it frozen from a pie I made a while back, feel free to use your favorite, this filling works great with most crusts.

Crust:
Makes enough for two 9-inch pies

Ingredients

  • 3 cups all-purpose flour
  • 1 tablespoon granulated sugar
  • 1 1/4 teaspoons salt
  • 2 1/4 sticks (18 tablespoons) cold unsalted butter, cut into small pieces
  • 1/2 cup plus 1 to 2 tablespoons ice water

Directions

  1. Pulse flour, sugar, and salt in a food processor to combine. Add butter, and process until mixture resembles coarse meal, about 10 seconds. With machine running, add ice water in a slow, steady stream until dough just holds together (no longer than 30 seconds).
  2. Divide dough in half. Shape each half into a disk, and wrap in plastic. Refrigerate for at least 1 hour (or up to 2 days). Dough can be frozen for up to 1 month; thaw overnight in the refrigerator.

Filling:

Ingredients
  • 6 tablespoons butter
  • 3/4 cup fresh lemon juice; the juice from about 3 lemons
  • 1/2 teaspoon salt
  • 1 2/3 cups sugar
  • 1 tablespoon cornmeal
  • 1 1/2 tablespoons cornstarch
  • 5 large eggs

Directions

  1. Melt the butter, and stir in the lemon juice, salt, sugar, cornmeal, cornstarch, and eggs.
  2. Whisk until well combined.
  3. Pour the filling into the chilled pie shell.
  4. Bake the pie on the bottom shelf of a preheated 375°F oven for 45 to 50 minutes, or until the center is set. The top should be golden brown.
  5. Remove the pie from the oven and allow it to cool before cutting and serving.
**Tasted really good the first day and even better after being refrigerated the next day**


    Monday, June 20, 2011

    Delicious, delicious napoleons

    These were so surprisingly easy to make that my waistline may never forgive me. Its basically just puff pastry, some vanilla custard thinned with whipped cream, and berries. The perfect dessert any time. I might also add that my mom even liked them. You might be thinking to yourself, of course she did, moms like everything their children do. Well, you clearly do not know my mom. Her usual response to things goes something like this..."So mom, what do you think?" "Hmmmmm," said in a disapproving tone. So, to have her compliment both how they looked and how they tasted (even though she got hers 2 days after they were completely assembled) was really fantastically awesome.


    Napoleons
    adapted from Martha Stewart

    Yield Makes 6

    Ingredients
    • For Assembling
      • 1 pound  puff pastry, about 1/3 recipe
      • 1/2 cup sugar, for work surface
      • Strawberries, cored and sliced into bite size pieces
    • For the Pastry Cream
      • 1 cup milk
      • 1/2 vanilla bean
      • 1/4 cup plus 1 tablespoon sugar
      • 3 egg yolks
      • 1 tablespoon all-purpose flour
      • 1 tablespoon cornstarch
      • 1 teaspoon unsalted butter
      • 1 cup heavy cream, softly whipped
    Directions
    1.     Prepare the Puff Pastry.
    2.     Preheat the oven to 375 degrees. Sprinkle work surface with sugar. Roll dough into a rectangle 1/8 inch thick and, using a sharp knife or a pastry cutter, cut in half. Cut each half into thirds, keeping rectangles equal sized, each approximately 6 inches by 8 inches. Water-spray two baking sheets and place pastry rectangles on them. Chill until firm, about 30 minutes. (If you only have 1 wire rack like I do and don't mind having big dents in 2 of the napoleons, you can do this on 1 baking sheet)
    3.     Prick rectangles all over with fork tines (I forgot to do this and it didn't seem to make a difference). Place a wire rack over each set of pastry rectangles and bake until pastry reaches the top of the rack, about 15 to 20 minutes. Remove rack and continue to bake until golden and evenly browned, about 5 to 10 minutes more. Cool completely on racks.
    4.     Make pastry cream: Scald the milk, vanilla bean, and 1/4 cup sugar. Beat egg yolks with remaining sugar until thick. Sprinkle in flour and cornstarch, and continue beating until well mixed.
    5.     Remove vanilla bean from milk. Beat half of the hot milk into yolk mixture. Return this to remaining hot milk and bring to a boil quickly, whisking very fast to prevent scorching. Remove from heat and pour into a bowl to cool. Rub top of pastry cream with  teaspoon of butter to prevent a skin from forming. Cover with plastic wrap and cool completely. Immediately before using, fold in softly whipped cream with a wooden spoon.


    6.     To assemble, slice each rectangle horizontally. Place each bottom half on a serving plate. Top with a 1/2-inch layer of pastry cream and berries. Place the top half on top of berries and repeat process with remaining rectangles. I added a small dollop of cream on top of the berries so that the top piece of pastry would stick. Garnish with berries and serve immediately. (Can be wrapped and refrigerated for a couple of days)

    Even though these are best served immediately after assembly, these were still truly fantastic after being wrapped with clear wrap and put in the refrigerator for a couple of days. They didn't get the slightest bit soggy, which was my big fear.

    Also, I had quite a bit of left over pastry cream that I covered with clear wrap and we used to dip berries in later in the week.